The Studeblogger

Sunday, January 30, 2011

Me and the boy

My wife took some shots of me and Reed next to the Stude this week. I love these pics!


And here's one from a church fund-raiser we did yesterday. I designed the team shirts :)

Labels: ,

Thursday, January 27, 2011

Scotsman Stickers reproduced

If you're a Stude geek, you probably already know about the Scotsman, Studebaker's bare-bones line of cars and trucks that were probably the brightest light in the stable during the dark years of 1957-1958, and the success of which was the impetus for the cut-down Lark of 1959. Scotsmans were notable for their lack of frills of any kind - no trim, no patterned upholstery, no carpet, little chrome - so austere that they came with only a driver's arm rest and sun visor! But they also came with an almost absurdly low price and as a result were a sales success, helping keep the doors of S-P open until Harold Churchill's Lark could breathe new life into the company. Scotsman cars were produced in '57 & '58; Scotsman pickup trucks from '57 to '59.

Scotsman pickups were so stripped down, in fact, that even the Studebaker nameplate that usually adorned the hood of the truck was deleted in favor of a decal, possibly the first such use of adhesive graphics on production automobiles. These decals were, given the limits of 1950s technology, understandably fragile and have not weathered the years well on surviving trucks - especially given the harsh use and environments trucks are generally subjected to. The decals have been unavailable for years.

Henry Votel, a Studebaker Drivers Club member, took it upon himself to research and reproduce these decals, both for the hood and the cab sides. They've been lovingly re-created using the best surviving originals as guides, even down to the slightly non-symmetrical shapes and hand-drawn nature of the graphics.

Henry has put a post on the SDC Forum detailing all the information he uncovered during the project - you can read it all here. If you have a Scotsman pickup and are interested in obtaining a set of these decals, you can contact Henry at:

Henry Votel
6015 190th Street N
Forest Lake, MN 55025
651-426-1610 

Cost at the time of this posting is $45 per set plus shipping in the US. The SDC Forum post referenced above also contains Henry's email address if you'd like to shoot him a note. As the folks on Hee-Haw used to say, "Saaaaa-LUTE!"

Labels: ,

Sunday, January 23, 2011

Nobody wants to smell your gas. Or: where's that coming from?

For a while now, the smell of gasoline has been pretty strong inside the car, and even stronger in the trunk, after sitting for a little while. I suspected that the problem was in the area of the fuel filler, since the smell was strongest there. In '63 Larks, Studebaker used a rubber hose to link the fuel tank inlet neck and the filler pipe.

The hose on my car was pretty soft, way more than I thought it should be. And every time I bent down to sniff, the gas was strong there. Studebaker International has all the hoses and gaskets needed to renew this connection, so I sent off for everything and a couple of days later came the little box that meant I had bits to install.

The first thing to do when you're working on anything in the vicinity of the gas tank is, of course, to disconnect the battery to avoid any unplanned combustion. Having done that, the first step is to remove the collar that screws to the trunk floor. Hey look - Rose Mist paint! That's Barney's original color. I don't know if he'll ever return to that color! But it is interesting to look at. The other interesting thing here is the obvious Merdework of a PO - see the expanded foam around the gasket?

At this point I realized that I would have to remove the filler neck from the car in order to get the rubber hose out of its location, as it was holding on to the two steel pipes like a Chinese finger trap. The pipe is easy to remove, being held in by four hex-head sheet-metal screws on the trunk filler panel. After these came out, the filler could be pushed inward a bit and, once the tower clamps on the hose were released, rotated free of its rubber receptacle.

There is also a vent tube that attaches to the extreme end of the filler neck. A short length of rubber hose connects to a loop of fuel line which exits the trunk through the floor. This allows for expansion of the gas in the tank on hot days. You can see the nipple exiting the filler pipe in the photo at left. The rubber hose that led off this nipple was original, and in fact it was held on by the factory spring clamps - another potential source of vapor leaks.

The hose freed, I could see part of the problem. It bore a NAPA legend, but it was not fuel-grade hose - it was thin, flexible and made of multiple layers of corded rubber material - almost like the construction of an old bias-ply tire. I don't know what this stuff was, but it surely was not appropriate for the job it had been doing.

In fact, upon close inspection, I could see that the old hose was permeated with several small but significant cracks, like this 1/4" example. In this photo you can see the fabric construction of the hose, too. Between being the wrong product for the use it was put to and the cracks that had developed in the material, it was pretty obvious that this was a significant source of the fuel vapor we'd been smelling.

I slid on the new rubber hose to keep any dirt from falling into the neck of the fuel tank, and spent a few minutes cleaning up the sealing collar. The PO had tried to seal the torn original factory rubber sheet gasket by shoving weatherstripping foam in the cracks and covering it all with what appeared to be roofing tar or tar-based caulk, probably straight out of the Henry's can. It took a while to clean off.

Nice rubber, eh?

After tightening up the lower tower clamp, I slid the new foam-rubber gasket around the hose and neck. The lead to the gas gauge sender enters the trunk through this point as well, so I had to take care to thread the wire between the hose and the gasket and make sure it didn't contact any metal edges it could vibrate against. Then it was time to put the filler neck back in; I had ordered a new rubber seal for this from SI. The old one peeled off like an F-18, and with the new one slipped on, I slid the neck into the new rubber filler hose (remembering to put the tower clamp and hold-down ring around it before doing so) and screwed it back to the car's filler panel.

From there, it was just a matter of tightening down both tower clamps, adjusting the new floor gasket so its holes lined up with the screw holes in the trunk floor, and then screwing the collar back down to the floor. Done!

Well, almost :) There's that vent hose to install. I deep-sixed the factory spring clamps and found a couple 1/2" towers in my toolbox, along with a length of fuel injection hose. 60 seconds later, the last bit of the puzzle is in place.

Ahhh... much better.

Oh, and don't forget to reconnect the fuel sender wire!

Although I had also obtained a new cork gasket for the fuel level sender, intending to re-seal that as well, since it could also have been a potential place for vapor leaks. But, applying my Durante-quality schnozz to the area, I found no trace of odor. And besides, I had no wish to disturb a good seal, although the gas gauge has a tendency to read empty with half a tank left, so I may need to tackle it one day. But that day was not today ;)


The real test, of course, is whether this repair and renew takes care of the fuel smell in the cabin. Leaving the car locked up over night, I waited until about 10AM, after the sun had ample opportunity to warm the tank, and opened up the door... success! There was a faint odor, but that was obviously just the remnants of months worth of gas vapor permeating the upholstery. Opening the trunk, I found no smell of gas at all. One more project checked off the list!

Labels: ,

Woot! That was easy!

Followup to yesterday's post regarding the headlights not working: Fixed that! After studying the wiring schematic last night, I determined that the only place in which the problem could reside lay in the vicinity of the headlamp circuit breaker. So, this morning, I lay down in the floor (again) with the flashlight in my mouth (again) and, within 30 seconds, found a loose feed wire to the breaker! Apparently, all my rooting around with the ignition switch yesterday had caused the (already somewhat loose) barrel connector to slip free of the breaker stud. 2 minutes later, the wire was reconnected, the switch mounted in the dash, and Barney was idling placidly in the driveway.

Ah... one in the "win" column :)

Labels: ,

Dang it!

Had some time yesterday so got to do a little work on Barney. First up was changing out the old gas filler hose in the trunk, which was letting fumes into the passenger compartment. That went well, so I tackled another project: putting in a new headlamp switch and ignition switch.

I changed out the headlamp switch first and tested it; headlamps worked! Awesome! Then I swapped out the old ignition switch for a new replacement from SI. Put it all back into the dash, turned the key - car fired right up. Yay! Tested the headlights - no lights. Boo.

I had to go to church so didn't have time to figure out what was wrong, and just disconnected the battery for the night. Looking at the wiring diagram, I think either the headlamp breaker opened or... well, that's really the only thing I can figure. I'll have some time this AM, so it's back to laying on my back in the floor again :)

Labels: ,

Tuesday, January 18, 2011

Nate Vonada's '41 Champion

If you enjoy reading stories about how to repair old cars, check out another Studeblogger: Nathan Vonada. He hosts a wonderful website that shows all the repair work he's done on his Grandfather's beautiful '41 Champion coupe; one of my favorite pre-war Studebakers. Its snazzy two-tone beltline trim gave it a class and dash far above that of its contemporaries, in my opinion. He takes on the brakes, front suspension, brakes again, interior, engine seals, brakes again... It's some great storytelling and a large amount of photos to boot.

Check Nathan's car and stories out at http://stude.vonadatech.com .

Labels:

Monday, January 17, 2011

Oil Change.

OK, really? A how-to post on changing your oil? Who doesn't know how to do that? Well, maybe. But stick with me; this tale has a surprise ending.

With 500 miles on the clock since commissioning his rebuilt engine, it was time to change Barney's break-in oil. For break-in, I had run a load of precious Service-CI4 formula Shell Rotella T (with a full load of ZDDP to protect the solid lifters in the Stude's engine), accompanied by a pint of GM Assembly Lubricant for extra break-in lubricity (ooh! $5.00 word!).

Oil changes, the traditional way, are messy, dirty jobs. You pull the drain plug from the pan, get splashed with hot, dirty oil, lose the plug in the bucket of hot, dirty oil, realize you forgot to pick up a new package of plug gaskets... So a while back, I purchased a Pela oil vacuum specifically to avoid all of this.

The Pela is great. All you have to do is push its pickup tube down your dipstick, attach the pump and give it about 10 strokes. In seconds, you see the tube fill with black gold and it begins to flow into the vacuum canister. OK, it takes a little time... the 5 liters in Barney's sump took about an hour to pump out. But that's about the same time you'd take to make certain everything finished dripping out of the oil pan -- and with a lot less mess.

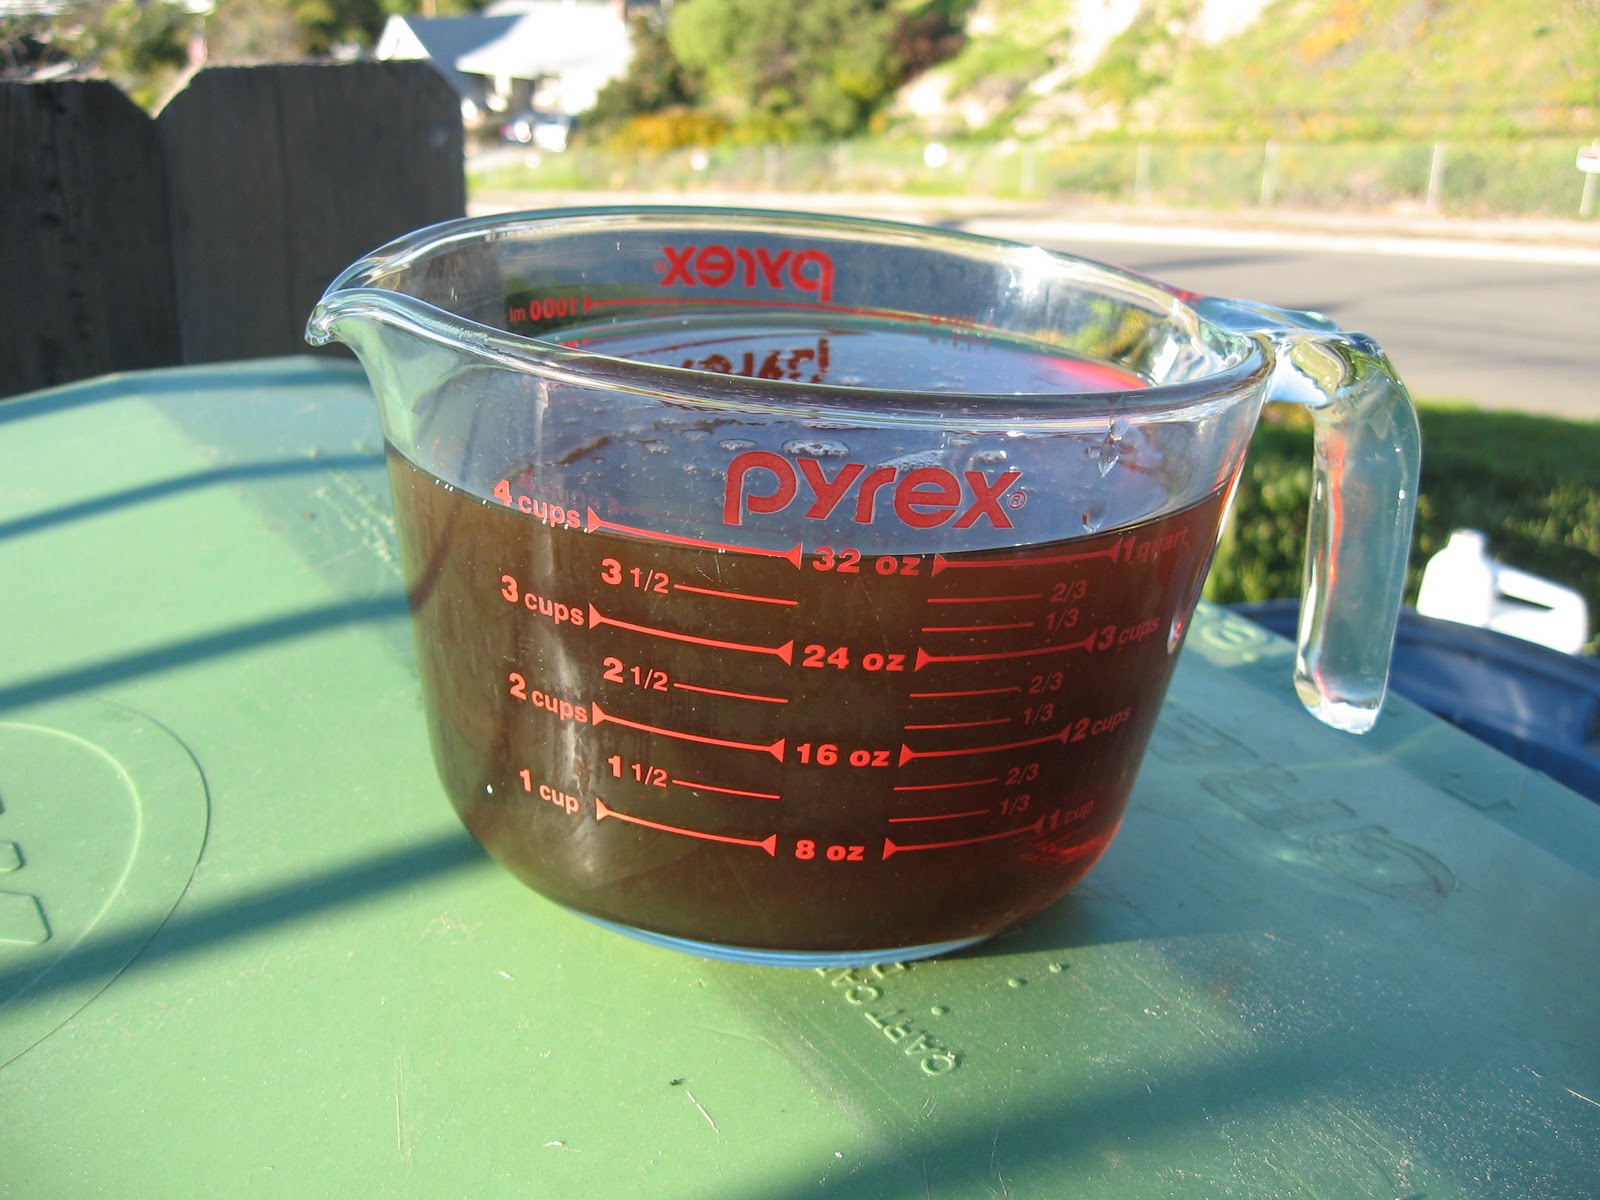
After cooling it, the deed was done and the engine had given up its filthy load of black lube. Nasty stuff for only 500 miles! But break-in is where all the rough edges inside a rebuilt engine get smoothed over, so the break-in oil is necessarily ugly.

So we're ready to pour in the new oil -- uh, no. Gotta change the filter first.

The oil filter on the car is a Purolator Premium Plus 30005. It's a full-quart unit that is rated very highly. Unfortunately, I couldn't find another in the area. But my NAPA supplied a Mobil 1 M1-203; it's a 3/4 quart filter, but has an upgraded element to handle the nasties.

Some guys just use the old screwdriver-jammed-through-the-can tool to remove old oil filters. I've tried that - once - and didn't like it. Too messy. Plus, the cans tend to tear; bad scene there.

I found this genuine ChannelLock oil filter pliers in the discount bin at NAPA for $5.00. You can't beat that deal with a stick! I like these better than the strap wrench because they "bite" the can but don't destroy it. The adjustable slip joint makes it easy to get a good grip. A little loosening and the filter spins right off.

Remember, that thing's full of dirty dino juice, so be sure you have a tub under the filter when you loosen it. A goodly amount of greasy goop will spill out once you undo it, too, since the system is under pressure.

You can probably get the filter off without raising the car (if you're skinny enough), but I like a little more elbow room. I chocked the rear wheels, lifted the front, and rolled under with my creeper in comfort.

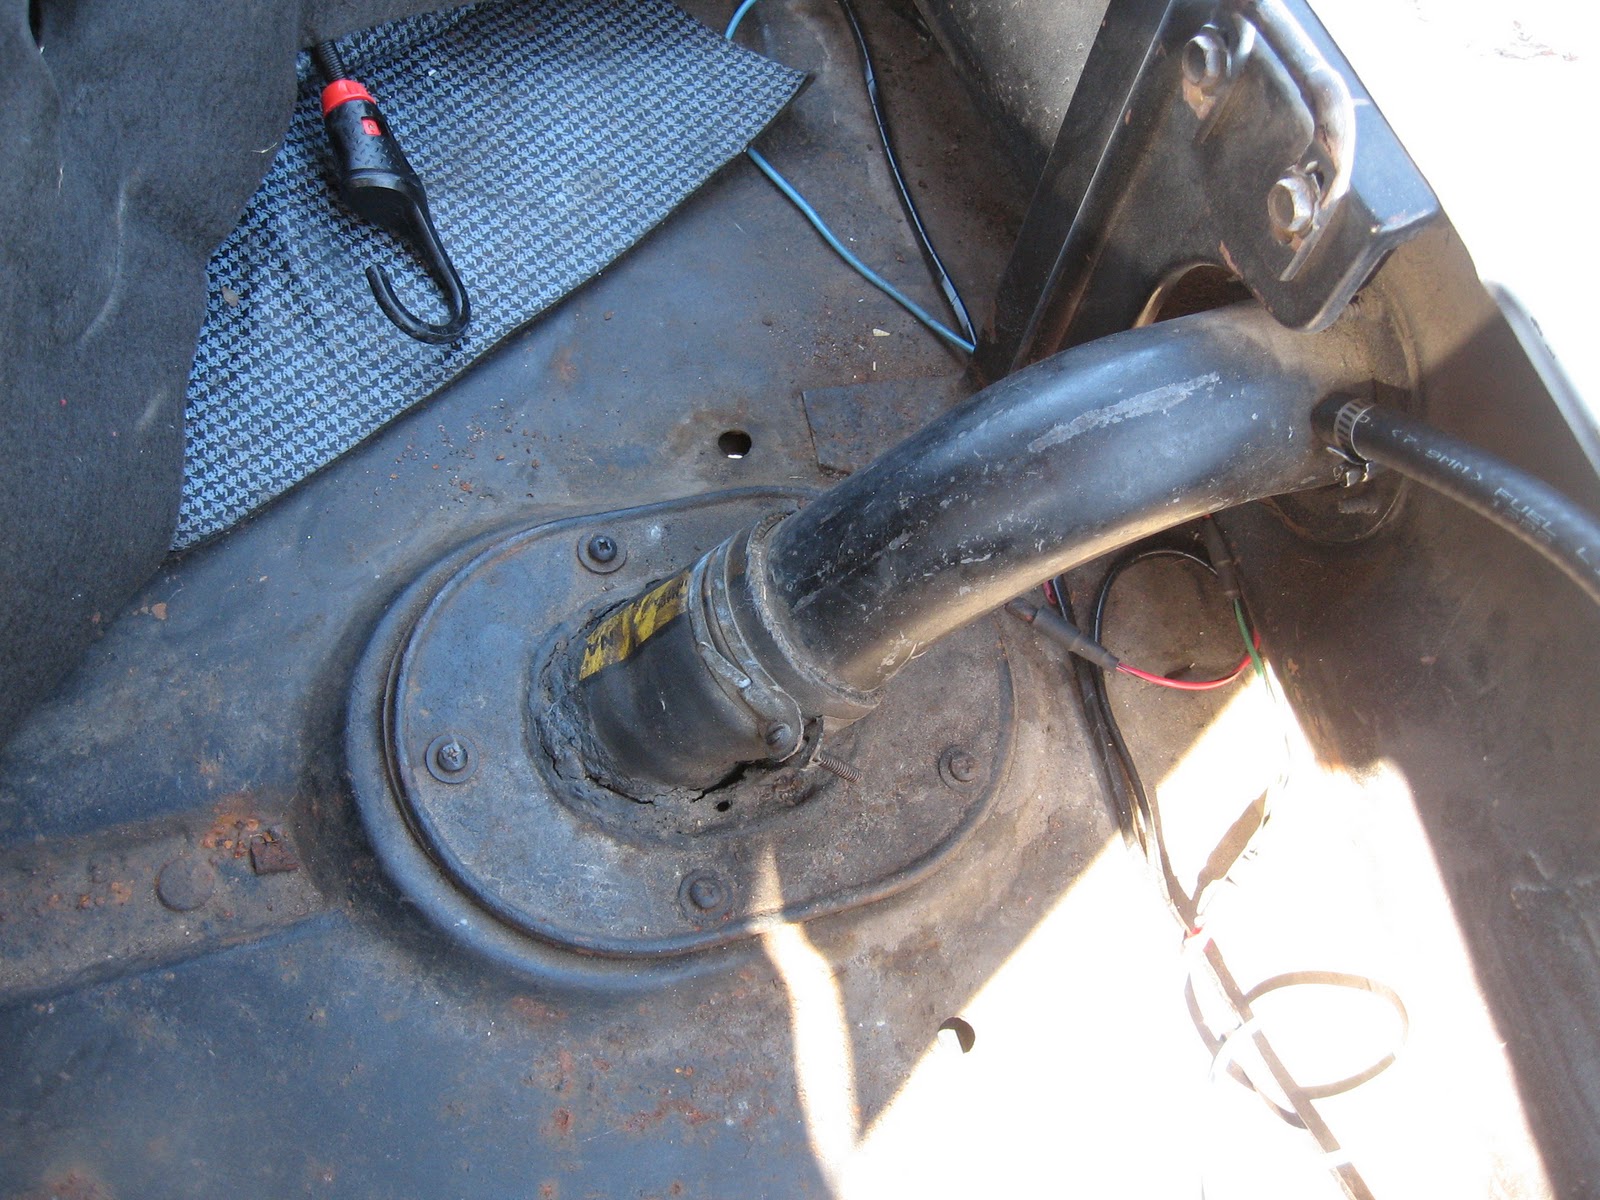
Notice in the photo above that the oil filter can is located directly over the passenger's side exhaust pipe. This is significant, because it means that --

Right. Studebaker engineers routed the exhaust pipe directly beneath the oil filter mount, virtually guaranteeing that I'll be smelling smoke for 20 miles until the oil burns off the pipe.

The good news is that, while I was down there, I found the two nuts that hold the flywheel inspection cover to the bellhousing were a bit loose, so I tightened them up. Don't forget to put a few drops of oil on the gasket of the new filter, and remember to spin it on hand-tight (not finger-tight!), or you'll wind up with a big grease spot on your driveway in pretty short order.

Now, here's the surprise I promised: if you go by the capacity chart in the Owner's manual, you'll be shy a quart of the honey gold. Yep, the Studebaker manual for 1963 lists the capacity of the engine (both 6 and 8) as 5 quarts. But if you put only 5 quarts in the engine, the dipstick will tell you you're a quart low. I know, because I measure out my oil before pouring it in.

The guys on the SDC Forum have confirmed this quirk. Perhaps it was a misprint, or a holdover from the old days when oil filters were accessories. Whatever the case, if you're doing a full oil and filter change, you'll need 6 quarts.

I always get a little knot in my stomach when I first fire up the engine after an oil change. There's always that little bit of apprehensiveness; the engine is spinning but the pressure gauge shows zero... and then, after a couple seconds, the needle shoots to its accustomed 60 pounds and stays there, the relief valve open and engine purring. Ahh... success :) Time for a drive!

Labels: , ,

Sunday, January 16, 2011

Better turn signal indications.

When I gave Barney his new wiring harness, I installed a full complement of brand-new instrument-panel bulbs of the type called out in the Owner's manual, #1445 bulbs in most locations. It quickly became apparent that at least two of them, the turn signal indicator and the Flight-O-Matic indicator lamp, were too dim to be seen in the daylight.

A Forum search turned up several threads on the subject, one of which is here. Folks in that thread recommended some other bulbs that would fit the space and provide more candlepower, so I tried those out and found them still wanting - I can barely see Barney's turn indicator when the signals are on.

So my Jameco catalog came and as I was leafing through it, I found LED replacements for bayonet-mount panel lamps - 12 volts at .30 milliamps. Unfortunately, searching their site turned up availability in only red or yellow LED colors, but a Google search found the white-light versions at Grainger. Grainger shows the LM-1012MB as a direct replacement for the 1445 bulb - for only $20 per item! I may not be a genuine CASO, but that's a little stiff for me.

Finally, another web search on the part number turned up a place called Bulb Town, whose site lists the LED "bulbs" for $13, a much more amenable price.  So I ordered a couple, which arrived in my mailbox last Thursday.

You'll notice that the package size of the LED is longer than the 1415 bulb that the factory used, but for in-dash lighting this is not a problem, as there is plenty of room in the gauge cases. I popped the LED bulb into the socket for the turn-signal telltale, and it was indeed notably brighter than the 1415, and very similar in brightness to the 1816 incandescent bulb that others have used. OK, one problem solved!

That left me with only one other issue: the flasher unit and its audible indication, of which there is barely any. Studebaker specified a 552 flasher can for this application. These are of the standard, bi-metallic strip design: A strip of metal inside the can, made of a laminate of brass and steel, is fastened at one end and makes contact with a stud on the other end. As electrical current passes through the metal strip, the steel side heats up faster than the brass, and the strip flexes, breaking the circuit. It cools, and contact is re-established. The cycle continues, and this is the way the blinking of the turn signal is accomplished. It's really a dirt-simple mechanism. I can only imagine, however, that the construction of these units has changed greatly since these cars were made, because the 552 unit I purchased new was 1) inaudible - no "tick tock" blinker indication, and 2) too fast - the first flash would be 1 second long, until the bimetal strip heated up, and then the flash cycle settled into a rapid blink of about 4 per second.

The Forum post on the issue had the solution: a "long life" flasher with an actual electrical relay inside, a much more robust mechanism than the bimetal strip. I was able to get this from my NAPA for a shade less than $9.00. It differs in appearance from the original style, but the package is virtually identical in size, and it plugged right in.

Woo hoo! Complete success! I now have an audible turn signal indication with a visible dash tell-tale, and turn signals that flash at a steady, noticeable rate. What a difference this makes! My son was a bit nonplussed by my enthusiasm for this improvement (maybe I did get a little too excited), but it sure is cool to have something that once again operates the way it was designed to.

As to the Flight-O-Matic indicator: the LED bulb package (and that of the 1816 bulb) is too large to fit into the lamp cover housing, so the solution to that problem eludes me for now.

Labels: , ,

Sunday, January 02, 2011

Head Bolt Torque, Revisited.

A while back I posted about checking and re-torquing head bolts on Studebaker V-8 engines. The Shop Manual contains all the torque specifications and the bolt tightening sequence (which I documented in my earlier post), but recently a thread on the Studebaker Drivers Club Forum made mention of an additional procedure worth noting. It's probably one that experienced mechanics take for granted, but I certainly don't fall into that category (and I know some of my readers don't either).

Specifically, the heads should be re-torqued when the engine is cold, and should be loosened slightly before tightening. Says Forum member Mike Van Veghten:
Always cold...at least 4 hours since the engine was run, cold.

This is important because the Shop Manual gives conflicting instructions, saying that one should warm up the engine "to stabilise the temperature" before checking head bolt torque. Mike explains that this is outdated thinking, and the reason to torque when cold is simple: the first few bolts torqued after running the engine will be to spec, but the engine immediately starts to cool, causing the metal to begin contracting. Bolts torqued after this process begins will be tightened to a different value than the first bolts you worked on!

Therefore, all bolts should be torqued to spec only when the fastened assemblies are cold. This includes valve adjusters.

Furthermore, Mike says:
Back each fastener out about 1/2 turn (one at a time), then re-tighten to the proper torque value. If you do not back the fastener out, you will not get the proper final torque put into the new tightening operation.

Now (as the saying goes), you know... the rest of the story!

Labels: , ,

Saturday, January 01, 2011

Happy Stude Year!

Hi all,

Been pretty quiet here on the blog, as Winter in California has kept me from doing anything but driving the car lately - not that that's a bad thing! It's been a lot of fun driving Barney around; the looks he gets are priceless. Some know what he is and will shout something appreciative. Others have no clue and just kind of gawk as we growl past.

But the rain has let up and now I'm starting to think about things I need to accomplish this year. My son, Reed, will be driving in June, so the car has to be ready for him. So here's what's got to get done in 2011:

  • Rear springs and frame bushings installed
  • Replace old tapered axle shafts with new splined
  • R&R windshield and backlight and install new gaskets
  • Adjust valves
  • Install new exhaust system
  • Track down and eliminate gasoline fumes in trunk
  • Install new steering wheel and connect horn circuit
  • Swap old ignition switch for new
Hey, this reads a lot like last year's to-do list! Geez, you'd figure I'd be farther ahead with 4 years of working on this car under my belt :)

By the way, these past few chilly weeks have given me ample opportunity to evaluate the effectiveness of my heater rebuild (chronicled here). I'm pleased to say that the heater works beautifully now, providing ample warmth; in fact, I can usually just open the air intake and slide the heat control down a little bit to keep my feet toasty - don't even need to run the blower! Well, that's one thing checked off the list, at least.

Labels: