The Studeblogger

Wednesday, September 01, 2021

New Wheels for Old Studebakers

Here's a topic that keeps coming up, so I thought I'd jot down what I know for others looking for this information: what new wheels will fit Studebaker cars?

First, wheels from other makes will fit Studebakers. Stock 5" Stude wheels have a 4.25" backspace, and OEM Ford & Mopar wheels with 4" backspace work just fine on a Stude.

  • Using a 15x 6" wheel with a 4" back space, such as those found on 85-89ish Ford LTDs, Mercury Marquis or Ford Crown Vics will work.
  • Rear-wheel-drive Chrysler Fifth Avenue or variants from Dodge or Plymouth - Diplomats, Furys, etc. will also work.

You can usually pick these up for a song from nearly any auto recycler, although they will certainly need refinishing before you bolt them on.

This one will work.

However, be aware that no currently produced wheel will hold Studebaker factory dog-dish hubcaps, which require a specifically-shaped inner hub to grip the caps. So if you're looking to put factory correct "poverty" caps back on your Stude, you'll need to source factory wheels. 

Wheel Vintiques were my choice for Barney.

For my car, I chose Wheel Vintiques Mopar 15 x 6" reproductions; they come in satin black and fit like a glove. I went to the junkyard and found a wheel off of an old Fury to test-fit, then went ahead and ordered new ones from Vintiques online. 

As I said earlier, these will not hold OEM Studebaker hubcaps, so you'll have to use something else or figure out a way to hold your Stude caps on (the problem is that the full-cover caps will snap on, but will then rotate as you drive, cutting the valve stems).

Since I'm not worried about originality, I finished mine off with vintage '70s Mopar police hubcaps, which are identical to the standard dog-dishes Mopar shipped on millions of Furies, Darts and Valiants, but with a ring of vents that helped in cooling the drum brakes on those big '70s cars. I think they turned out pretty good!


Labels: , , , ,

Saturday, March 09, 2013

Advanced Distributing for Studebakers.

That little part above is, as you probably know, a vacuum advance canister (or "spark modifier" in Studebaker parlance" for a Delco distributor of the type used on Studebaker V8 Larks from 1960 to 1961. Although only used by the factory during those two years, the "window-type" Delco is prized by many Stude drivers because it's easy to rebuild, get parts for, and set point gap on, compared to the Prestolite units used on other years.

As detailed in an earlier post, I obtained and rebuilt one of these Delcos, using a core graciously given to me by Warren Webb, one of the regulars on the Studebaker Drivers Club Forum.

At the time I built it, however, I installed a vacuum advance specified for a 1961 Impala, figuring (wrongly) that a vacuum can is just a vacuum can. I should have known better! What I've found out since is that not all cans are equal. On this Forum thread, Joe Hall notes that the can commonly sold for Studebaker applications (NAPA VC680) is actually 2 degrees shy of the Studebaker OEM advance setting for V8 cars.

It turns out that nearly all of these vacuum advance units are all manufactured by Dana Engine Controls, now owned by Standard Motor Products, so no matter what brand you buy, it's the same part in the box. The trick is determining the right part. And there are about 25 different cans, each with a different setting for the point at which full advance kicks in. So how do you identify them?

Dana stamps a number on the mounting bracket of each advance unit. Each number corresponds to an advance profile that denotes how much vacuum must be applied to achieve full advance. It turns out, according to Joe Hall's research, that the Studebaker part number is "B20." The VC680 that NAPA's system specfies is "B1". Obviously the wrong part.

Insufficient advance can be responsible for lost power and poor gas mileage - both of which my Barney has exhibited. So I started digging to find out what part number was correct for the Studebaker distributor. VC1765 turns out to be the correct Stude part.

Thanks to the guys on the Corvette forums, who know their stuff when it comes to Delco parts, I found out the difference in the two parts' advance delivery settings:
  • VC680 (stamped "B1") delivers 0 degrees of advance until 8" of vacuum, and 16 degrees of advance at 16" of vacuum.
  • VC1765 (stamped "B20") deliver 0 degrees of advance until 6" of vacuum, and 16 of advance at 12" of vacuum.
So the part I had on the car started delivering advance too late, and full advance came in waaaaay too late. No wonder I was getting crappy mileage! B20, by the way, is the unit used on high-performance GM engines. I take a bit of pride in knowing that. (According to a very scholarly treatise on vacuum advances written by Lars Grimsrud of TunedbyLars.com, B26 carries the same specs as B20 and may be found in the same box.)

So I went to my friendly local NAPA and ordered a VC1765. Wisely, I  checked the part before leaving the store - the wrong part was in the box, with a hand-written label that had another part number on it! Always check. Another part ordered, and this time it was correct - B20 stamped into the boss.

Replacement is easy, and doesn't require removing the distributor from the car. Just unplug the coil wire and undo the two spring-loaded screw clamps that hold the distributor cap on, and move it out of the way. The screws that hold the vacuum advance to the distributor base are accessible from the passenger side of the car once the cap is removed.

As you can see in the photo above, there are two screws holding the advance unit on. Use a magnetized screwdriver to remove them, otherwise you'll be cussing as you remove the distributor to fish them out after you've dropped them! Also note that a lug attached to a wire that grounds the breaker plate is located under the screw at the end of the actuating rod - you'll need to replace it there after installing the new advance.

After the screws are removed, pull the advance unit out; the actuating rod will then be able to rotate out of the hole in the breaker plate by pulling the advance body upward.

Installation, as they say, is the reverse of removal. Once it's all back together, don't forget to check the timing and reset the idle if need be.

For some interesting reading about vacuum advance, check out this post from the Vetteclub Forum, and the aforementioned paper from Lars Grimsrud. You'll find out everything you need to know and more!

Labels: , , , ,

Thursday, January 24, 2013

Repro Studebaker C/K Fenders on the way!

One thing that owners of more popular marques - like Chevrolet, Pontiac, Ford, etc. - have long enjoyed is the ability to order reproduction sheet-metal for their cars. Heck, you can buy entire body tubs for '57 Chevys, but new body parts for Studebakers? Dream on.

(OK, sidebar: our friends at Classic Enterprises have a good assortment of structural steel pieces for our Studes - torque boxes, floor pans and such - but no body stampings.)

Anyway, Steven Tomblin of Goodmark (one of the aforementioned providers of GM and MoPar sheet metal) posted today on the SDC Forum that reproduction C/K rear fenders are just about ready to be released. Their prototypes are in the test-fit phase, in fact.

This is amazingly good news. While front fenders are probably needed more due to the rust-encouraging way that Studebaker designed them, the fact that a company - and a major one like Goodmark, no less - is beginning to reproduce Studebaker parts is a bright light indeed.

Maybe, with luck, we can look forward to new '59 - '61 Lark front fenders, or '64 - '66 trunk lids one day. I know, it's a pipe dream, but maybe...

Keep your fingers crossed!

Labels: , , , ,

Thursday, January 17, 2013

Studebaker Front End Rebuild Series

 
One of the most popular topics on my blog has to be the How-To series I wrote about rebuilding your Studebaker's front-end suspension. This is the topic of more questions than any other, and get more hits than any other here on the site, too. So here's a listing of all eight parts, now in one convenient carry-home size!

Now go get'er done!

Labels: , , , ,

Monday, August 13, 2012

Where can I find Studebaker parts?

Yeah, it's true - there hasn't been a Studebaker made since 1966. So it must be impossible to find parts, right? Wrong!

Check out this video taken at the recent (August, 2012) Studebaker Drivers Club International Meet in South Bend, Indiana. You'll see thousands of parts, mechanical, body and trim, plus interviews with parts vendors and reproducers who can find or make nearly anything for a postwar Stude.


If you're looking for Studebaker parts, as the video says,  your best bet is to join the Studebaker Drivers Club and avail yourself of all the resources available there. But if you're not the joining type, that's OK too - check out StudebakerVendors.com for a big listing of who and what.

Keep those Studes running!

Labels: , ,

Thursday, January 27, 2011

Scotsman Stickers reproduced

If you're a Stude geek, you probably already know about the Scotsman, Studebaker's bare-bones line of cars and trucks that were probably the brightest light in the stable during the dark years of 1957-1958, and the success of which was the impetus for the cut-down Lark of 1959. Scotsmans were notable for their lack of frills of any kind - no trim, no patterned upholstery, no carpet, little chrome - so austere that they came with only a driver's arm rest and sun visor! But they also came with an almost absurdly low price and as a result were a sales success, helping keep the doors of S-P open until Harold Churchill's Lark could breathe new life into the company. Scotsman cars were produced in '57 & '58; Scotsman pickup trucks from '57 to '59.

Scotsman pickups were so stripped down, in fact, that even the Studebaker nameplate that usually adorned the hood of the truck was deleted in favor of a decal, possibly the first such use of adhesive graphics on production automobiles. These decals were, given the limits of 1950s technology, understandably fragile and have not weathered the years well on surviving trucks - especially given the harsh use and environments trucks are generally subjected to. The decals have been unavailable for years.

Henry Votel, a Studebaker Drivers Club member, took it upon himself to research and reproduce these decals, both for the hood and the cab sides. They've been lovingly re-created using the best surviving originals as guides, even down to the slightly non-symmetrical shapes and hand-drawn nature of the graphics.

Henry has put a post on the SDC Forum detailing all the information he uncovered during the project - you can read it all here. If you have a Scotsman pickup and are interested in obtaining a set of these decals, you can contact Henry at:

Henry Votel
6015 190th Street N
Forest Lake, MN 55025
651-426-1610 

Cost at the time of this posting is $45 per set plus shipping in the US. The SDC Forum post referenced above also contains Henry's email address if you'd like to shoot him a note. As the folks on Hee-Haw used to say, "Saaaaa-LUTE!"

Labels: ,

Sunday, January 16, 2011

Better turn signal indications.

When I gave Barney his new wiring harness, I installed a full complement of brand-new instrument-panel bulbs of the type called out in the Owner's manual, #1445 bulbs in most locations. It quickly became apparent that at least two of them, the turn signal indicator and the Flight-O-Matic indicator lamp, were too dim to be seen in the daylight.

A Forum search turned up several threads on the subject, one of which is here. Folks in that thread recommended some other bulbs that would fit the space and provide more candlepower, so I tried those out and found them still wanting - I can barely see Barney's turn indicator when the signals are on.

So my Jameco catalog came and as I was leafing through it, I found LED replacements for bayonet-mount panel lamps - 12 volts at .30 milliamps. Unfortunately, searching their site turned up availability in only red or yellow LED colors, but a Google search found the white-light versions at Grainger. Grainger shows the LM-1012MB as a direct replacement for the 1445 bulb - for only $20 per item! I may not be a genuine CASO, but that's a little stiff for me.

Finally, another web search on the part number turned up a place called Bulb Town, whose site lists the LED "bulbs" for $13, a much more amenable price.  So I ordered a couple, which arrived in my mailbox last Thursday.

You'll notice that the package size of the LED is longer than the 1415 bulb that the factory used, but for in-dash lighting this is not a problem, as there is plenty of room in the gauge cases. I popped the LED bulb into the socket for the turn-signal telltale, and it was indeed notably brighter than the 1415, and very similar in brightness to the 1816 incandescent bulb that others have used. OK, one problem solved!

That left me with only one other issue: the flasher unit and its audible indication, of which there is barely any. Studebaker specified a 552 flasher can for this application. These are of the standard, bi-metallic strip design: A strip of metal inside the can, made of a laminate of brass and steel, is fastened at one end and makes contact with a stud on the other end. As electrical current passes through the metal strip, the steel side heats up faster than the brass, and the strip flexes, breaking the circuit. It cools, and contact is re-established. The cycle continues, and this is the way the blinking of the turn signal is accomplished. It's really a dirt-simple mechanism. I can only imagine, however, that the construction of these units has changed greatly since these cars were made, because the 552 unit I purchased new was 1) inaudible - no "tick tock" blinker indication, and 2) too fast - the first flash would be 1 second long, until the bimetal strip heated up, and then the flash cycle settled into a rapid blink of about 4 per second.

The Forum post on the issue had the solution: a "long life" flasher with an actual electrical relay inside, a much more robust mechanism than the bimetal strip. I was able to get this from my NAPA for a shade less than $9.00. It differs in appearance from the original style, but the package is virtually identical in size, and it plugged right in.

Woo hoo! Complete success! I now have an audible turn signal indication with a visible dash tell-tale, and turn signals that flash at a steady, noticeable rate. What a difference this makes! My son was a bit nonplussed by my enthusiasm for this improvement (maybe I did get a little too excited), but it sure is cool to have something that once again operates the way it was designed to.

As to the Flight-O-Matic indicator: the LED bulb package (and that of the 1816 bulb) is too large to fit into the lamp cover housing, so the solution to that problem eludes me for now.

Labels: , ,

Tuesday, September 07, 2010

Oil Breather Caps for late Studebaker engines

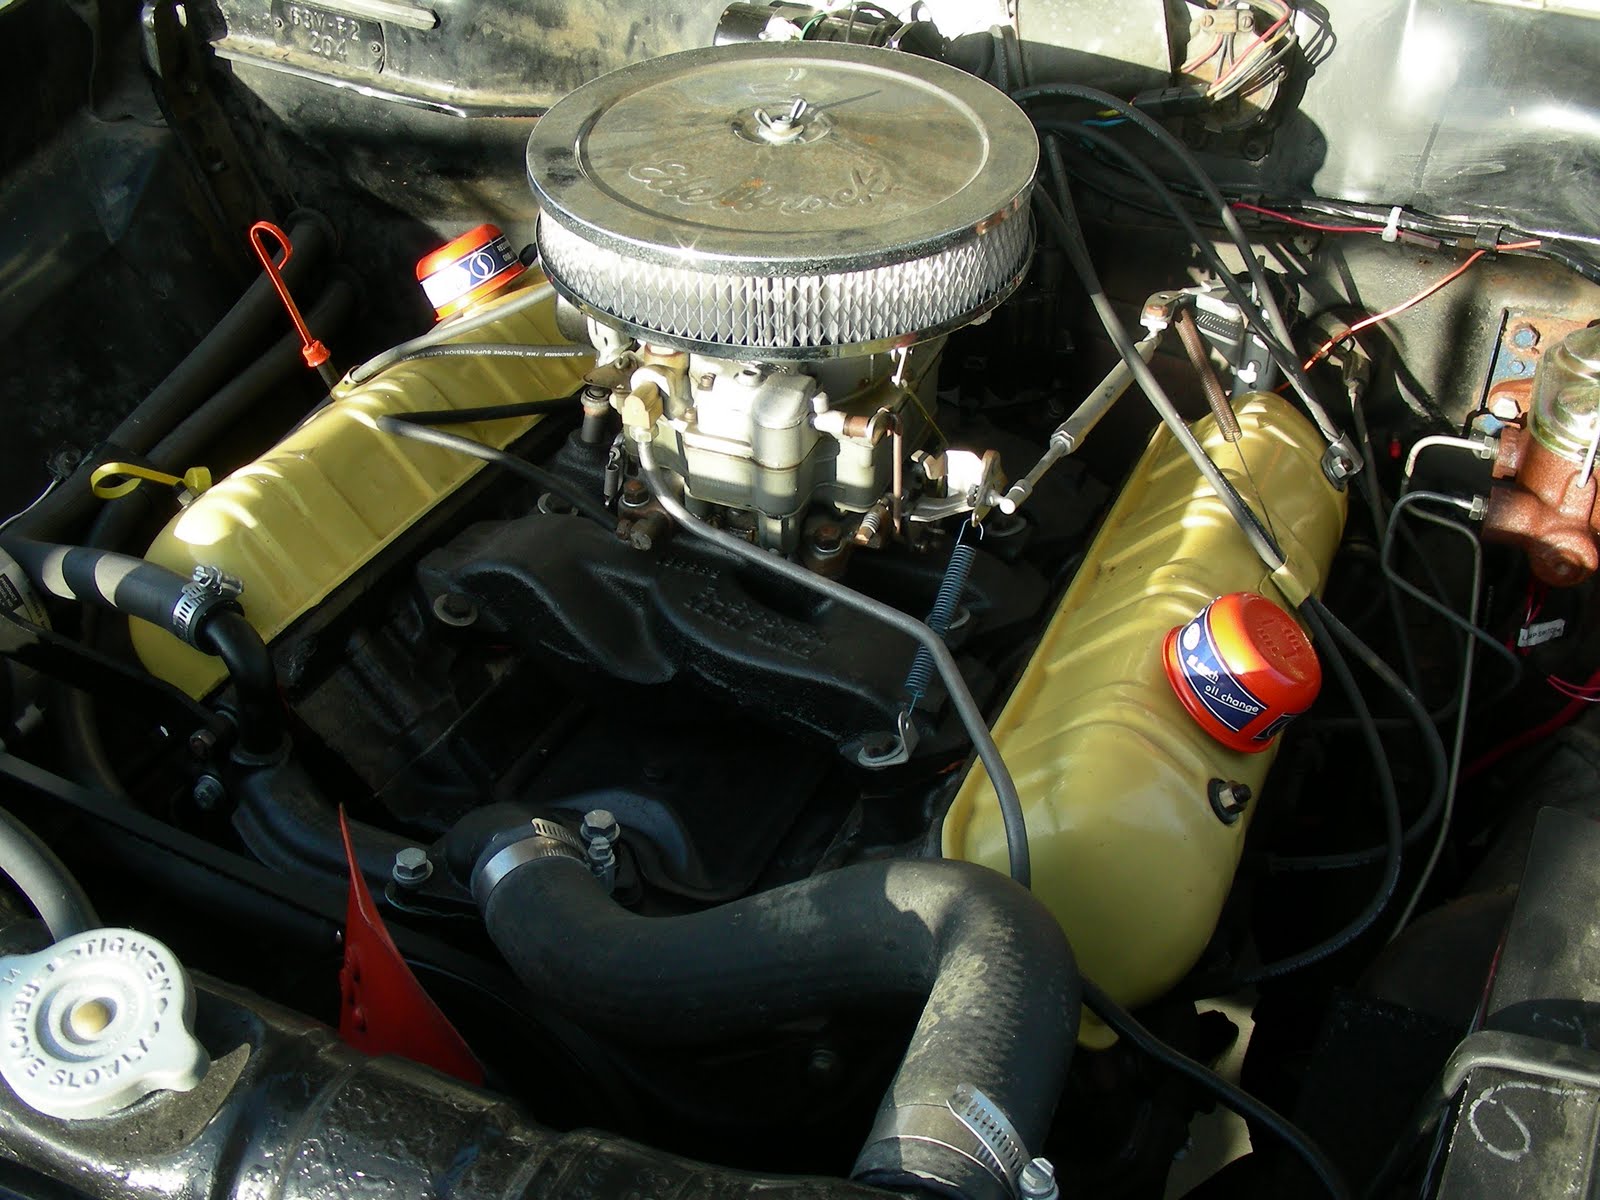
When you're detailing an engine, it's the little stuff that makes the difference. Decals are one thing that contribute, as are correct engine accessories. In my case, the oil breather/filler caps were one of the last things to need touching.

Studebaker converted to full-flow engines (that is, an engine where 100% of the lubricating oil is filtered) in late 1962. Prior to that, Stude V-8s were partial flow engines, meaning that not all the oil was filtered as it passed through the oiling system. The two engine types can be immediately identified by the location of the oil filler tubes and the valve cover design: partial flow engines have a filler standpipe front-and-center, forward of the valley cover, and the valve covers have no filler openings. Full-flow engines have oil fillers in the valve covers  and no standpipe on the block.

Compare the two photos below to see the difference: On the left is a V-8 installed in a '62 Lark; its central oil fill and solid valve covers mark it as a partial flow engine, while the '63 engine compartment on the left has the dual valve-cover-mounted fillers of a full-flow engine.


Regardless of the type of engine installed, notice that the oil filler cap is the same in each photo: a low-profile orange cap with a blue and white label. This cap, painted orange, was used on all standard '62 - '64 Studebaker engines. A chromed version was used on Jet Thrust engines installed in all Avantis, or on Larks and Hawks that had an optional JT engine. In fact, I believe the basic design of this cap dates back to the very beginnings of the Studebaker V-8; the photo below shows a cap of similar (if not identical) design installed atop the oil filler of a pristine 7,400-mile 1951 Commander State sedan.


Nevertheless, if your cap is missing, it is available as a reproduction from Studebaker vendors - but only with the chromed finish. I don't know why they don't offer a painted version, since there were far more non-JT engines produced over the years, but there it is. So if you have a pair, re-use them! Or get a used pair cheap, wash them up and refurb. Here's the quick-and-dirty makeover.

When I acquired Barney, his OEM Stude breathers were already long gone, ditched in favor of a set of Mr. Gasket chromies. These work find and look OK, but they sit high; the Stude breathers snuggle down over the filler pipe and sit close to the valve covers. So I procured a used set from an SDC Forum user and proceeded to strip off the old paint. The photo here shows an original breather alongside its twin, paint removed using a nylon abrasive wheel.

After the old paint's gone, the new goes on. The secret here is to use Dupli-Color DE1620, better known as Chevy Orange. It's a perfect match for the orange paint Studebaker used in several places under the hood on late V-8s. I always use a base-coat of Rust-Oleum red primer just to even things out; after that, the Orange goes on.

Not a bad result! This is after a coat of primer and two coats of Orange. Now the finishing touch: the decals. These are correct for 1961-1964 caps; older ones were painted only solid colors. The decals are basically STP advertisements (Studebaker acquired STP in '61 as the Corporation began to diversify). These labels are reproduced and can be gotten from Studebaker vendors.

There was some discussion on the Forum a while back as to which direction these labels were applied; some maintained that they went on so that the lettering could be read correctly with the cap installed; others swore that the labels were put on upside-down at the factory. I prefer mine right-side-up, so that's the way I put them on. It just makes sense that way, to me! The labels are self-adhesive, so no wetting and sliding of decals is needed. Here are the completed caps, ready to go.


Above are before-and-after shots of Barney's engine. On the left, the Mr. Gasket breathers. As I said, they're not bad. On the right, the newly-refurbed Studebaker caps. Notice how they hug the valve covers. Also, you can see in the photo below, the Dupli-Color orange really is a perfect match for the OEM paint: the Viscous Drive fan in the photo has factory-original paint and the difference, to my eye, is nil.


Happy Studebakering!

Labels: , , , ,

Saturday, July 17, 2010

Modern cooling fan replacement for Studebakers.

OK, first off, Barney's back and running fine, even in the 85+ degree weather we've been having. The new heater installation works great, doesn't drip anti-freeze on the carpet, doesn't fog the windows. Supreme!

But cooling is always an issue for older cars. Most were not equipped with over-capacity cooling systems like modern cars have. My '67 Pontiac (and all Ponchos with the original PMD-designed engine) are notorious for running hot; problems include vapor lock, heat-soaking the starter and solenoid, and simple boil-out - shut the car off and hear the relief valve hiss open after a couple of minutes. Owning an old car means always having to check your radiator!

Some makes can be easily retrofitted with either RPM-dependent clutch fans or thermostatic fans that decouple the cooling fan from the water pump shaft at a certain velocity or temperature, in order to permit better cooling at cruising speeds. GM cars can be easily equipped with OEM-style aftermarket or reproduction clutches. You can put a declutching fan on a Studebaker as well, but the repro clutches are pretty pricey and are not thermostatically-operated, as the original (optional) equipment was.

Luckily, I scored a factory Viscous Drive thermostatic clutch and fan for Barney, which bolted right onto the water pump drive hub after removing the original fixed 4-blade fan and spacer, but not everyone is so lucky.

With that in mind, I wanted to post a tech tip found on the Studebaker Drivers Club Forums last night. Member "HammondA100" from Sioux Falls, SD., found that Flex-A-Lite makes a modern flex-fan that will mount to the Studebaker hub with very little modification, helping make sure your car runs cool in hot weather. He wrote:

I've seen here on the difficulty of finding the right adapters and most efficient cooling fans for bolt on ease. I just got around to inspect what my 57 Silver Hawk had on it from the Nevada desert which turns out to be a early fiberglass fan and an aluminum hub adapter S-008 made by Flex-A-Lite 25 years ago.
[After a] quick phone call to their tech help and a search at http://www.flex-a-lite.com/ I was recommended to trash the old fiberglass unit for safety. I gave him all the measurements and turns out they have all the solutions.

The hub part #876 allows for a 1" hub so on a stude you would need to turn it out to 1-1/16" - an easy fix.. This hub already had that treatment so I don't have to do anything there. As for the proper flex-fan - perfect match. The FlexALite 1818. 18-1/4 diamater, 2-1/2" projected width creates a constant high static pressure, low noise movement of air as it's 7 blades. I found it for only $48 at Summit Racing.

http://www.flex-a-lite.com/auto/html/belt-driven-fans.html 

Well one less thing to worry about and I hope I could help someone find the right fan. They have a huge selection of electric fan set-ups too as they claim to be the pioneer of these.

They also sell a easy to mount heater unit to simplify the stock set-up.

 Keep 'em cool and enjoy the summer!

Labels: ,

Tuesday, January 19, 2010

Rain Delay! and alternator woes.


Well, Southern California is finally getting some rainfall after several years of record drought, and I'm not complaining - we surely need it and thanks be to God! Downside of this is that there's no Studebakering until the wet stuff stops. Poor Barney sits under the cover that's glued to him like a prom dress on a cheerleader until after the rain is done.

In the meantime, the rain was delayed long enough that on Sunday I was able to pull the alternator for service. About a week ago, I took Barney for his first twilight drive with lights blazing, and saw the ammeter doing a weird little dance afterward - after powering up a nearby hill at 50 MPH, I came off the throttle and saw the dash and headlights dim dramatically as the Amp needle fell halfway to the "D"ischarge mark.

At first I thought perhaps the drive belt was slipping during the high-speed (!) run, so I tightened it up the next day and saw the ammeter behaving like it should. But the problem reoccurred, so I asked around and found that Richer Auto Electric (official electric shop for the Little Guys street rod club)was located literally around the corner from me.

So off I went on Monday and dropped Barney's alternator on the counter at Richer, where Jim took it to the back, strapped it to the test machine and came back pronouncing it non-operational. Glad I found that out before it quit on the car! I guess it pays to have these items tested when you don't know for sure the condition they're in. Jim told me he'll have the rebuild done by the end of the week.

By the way, I found that Wilson Auto Electric makes a direct, bolt-in replacement for the Prestolite ALK-5001 that Studebaker used in many late-model Larks. It's p/n 90-06-1001, and you can get one online here, should you need to.

Labels: , , ,

Thursday, December 03, 2009

Another reason I love Studebakers.

One comment you always seem to get when people find out you own a Studebaker is "Boy! I bet parts are hard to get!" But reality is exactly the opposite -- Studes have one of the best supplies of NOS and reproduced parts of any American carmaker. Sure, there are soft trim items and model-specific bits that can be hard to come by (I'm still looking for an NOS right backup light lens for Barney, in case you have one!), but by-and-large, it's less hassle getting parts for my Lark than for, say, a '62 Grand Prix, a '64 Falcon or a '66 Ambassador Classic.


Case in point: after my recent re-wiring job, it dawned on me that the only bits of wire in the car that were still original were the headlight and front turn signal leads. So I opened my trusty Studebaker International catalog and found both headlight leads and front indicator assemblies (the entire lamp bucket with attached leads). Popped in my credit card and 7 days later, the mailman delivered, fresh in the factory parts envelopes, NOS parts for everything I'd ordered.

This isn't an isolated occurrence, either - I've ordered and received many NOS parts from Stude vendors in the last three years. Now, I ask you, what other marque has that kind of original parts availability? By contrast, the last OEM part I was able to get for my '67 Pontiac LeMans was the driver's door mirror, which I ordered through my local Pontiac dealer's parts department. And it was crappy - the molds were so old and degraded that I couldn't drive the car over 30 MPH without the mirror flopping over to point at the pavement.

So if questions about parts availability is keeping you from buying a Studebaker - don't worry. Somewhere, what you need is out there, and more than likely still in a factory package.

If you're looking for parts you can't find from one of the vendors at StudebakerVendors.com, try the following:
  • Studebaker Swap, a forum-based place to post wants and items for sale.
  • The Studebaker Parts Swap Page, a bulletin-board swap spot that's been up for a long while.
  • The parts swap boards of Sonny's Racing Studebakers! forum, a cool site dedicated to Studebaker performance.
  • If you've got another place you like, let me know and I'll add it here!

Labels: ,

Monday, November 30, 2009

Heater Valve Rebuild Service.


Got a leaky heater valve in your car, dripping water down the firewall and soaking the carpet? Stuck using a "replacement" valve that operates backward from normal? Or is your valve just frozen, unable to open or, worse, halfway open and heating the passenger compartment to uncomfortable levels?

Either way, something needs to be done. It so happens that your old Harrison or Ranco valves are rebuildable, if they're not too far gone, and Jim Tucker provides that service.Studebaker's Climatizer heating system used Ranco valves, which up until recently were not available new, and even now the repros are not cheap. Check out his website at www.heatercontrolvalve.com - fix the valve and save your floorboards!

Labels: ,

Wednesday, November 25, 2009

I'm thankful for new brakes!


It's Thanksgiving, and I have much to be grateful for - my beautiful wife of 22 years, my son Reed who isn't too much of a wiseacre too much of the time, my job, and good friends and family. And I thank God for all these things.

But today I'm thankful for one more thing - brand new front brake drums and hubs from Chuck Collins, which came with the FedEx man around lunchtime. Along with the new wheel bearings and oil seals I'd squirreled away, these will go to Vista Brake next week -- hopefully, along with the set of used rear drums that are en route from Bob Peterson. Once Bryan gets these, Barney will be on the road again. Hmmm, I can hear Willie Nelson in my head...!

You can find Chuck Collins' Studebaker Parts Online at:

StudebakerParts.Com
2410 W. Freeway Ln.
Phoenix AZ 85021
602-995-5311

And if you're looking for parts from Bob Peterson:

C & B Studebakers
Castro Valley, CA
510-266-2522

Happy Thanksgiving!

Labels: , , ,

Monday, October 19, 2009

Lark Heater rebuild, Part 3: Installation

In Part 1, we yanked the old heater from the car. In Part 2, we made it all pretty again. In Part 3, we'll tackle putting all the disparate parts back together and making a functioning system again.

As the diagram shows, there are quite a few parts that have to go together - more little bitty ones than you'd generally expect. Luckily, as mentioned in an earlier post, most everything essential is available new from Studebaker vendors, even previously hard-to-find things like the Ranco water control valves that invariably wear out and leak.
 
First things first: Assemble all your bits. Here you can see all the stuff I've collected that make up the Lark's heating system: blower and core housing assembly, core gasket, newly-rebuilt heater core, refurbished heater/diverter box, molded coolant supply and return hoses, firewall hose grommets and Ranco valve + mounting bracket.

Before beginning installation, take a moment to lubricate your heater control cables. There are three; one that goes to the water control valve, one to the defroster mode flapper in the heater box, and a third to the air control flapper, also in the heater box. Studebaker used coil-wrapped control cables, so they are easily lubricated. I drenched mine liberally using a spray silicone lube.

The first item to go back in is the core/blower assembly, but first we have to reunite the core with its case.

I had my core rebuilt by what I think is the last old-school full-service radiator shop in North San Diego County, S&S Radiator King in Oceanside. S&S has been at it over 30 years, and they can fix or fab just about anything. I took my old core to them for testing and they confirmed that it was dead. "We'd solder one hole, and another would open up," said Mike, the owner. They searched around for a new core, but that size isn't made anymore. They scared up one that was about a quarter inch narrower, but still fit the tanks, and my heater was back among the living.

When I disassembled the core initially, I found that the factory used a generous glob of plumber's putty in each corner to keep the core from vibrating around in its case, so I did the same. I also found a small, triangular rubber bit that was placed in a crevice in one of the tanks; I don't know why it was there, but I saved it and replaced it.

Once the core was seated back in its case and the two mounting screws secured it to the flange, it was ready to re-mount under the dash.

The core is a very tight fit in the dash opening, and the mounting studs affixed to the dash are at the extreme corners of their mounting positions, so the core case must go onto the studs absolutely straight in order to make it up into the hole correctly. Don't forget to place the foam sealing gasket around the core before beginning the reassembly. I didn't use any sealer or caulk to hold the gasket on; bolting it into place is all the sealing it needs.

The core is held on by four nuts with anti-shake shoulders, like the ones shown at the right. You've probably already seen that the black ground lead from the blower motor ends in a ring terminal; it needs to be placed between the core case and one of these washers to complete the blower motor power circuit. Tuck the other two leads out of the way for a moment.

Now that the core and blower are reinstalled, we can mount the Ranco water control valve back under the dash. On earlier cars, this valve was mounted in the engine room on the firewall, but ours is in much closer proximity to the core and easier to service and install. Note the capillary tube that senses the ambient temperature; this needs to be coiled and located on top of the valve. I wound mine carefully around the handle of a screwdriver. The bracket screws to the lip on the underside of the dash with two big, honkin' sheet metal screws. It's best to connect the control cable to the valve before mounting it, since the tab that the cable screws to is harder to access with the valve in place.

Here you can see the relationship of the inlet and outlet nipples on the core and water valve, now that both have been mounted in the car:


What you can't see in the photo above are the holes in the firewall through which the heater hoses enter the cabin. That's right -- they're behind the blower case. There's enough room to get them by the case and onto their respective nipples, but only just.

It's time to start connecting hoses. The factory shop manual recommends using gasket shellac to paint the nipples with; not only will this lube the metal and make it easier to get the hoses on, but it will set up quickly and seal any gaps between hose and pipe, preventing leaks. I got a bottle of ol' skool Indian Head gasket shellac from my friendly local NAPA, where they've gotten to know me on sight since Barney arrived :) It works as advertised: paint the pipe, slip on the hose and tighten the clamp - you're done.

The factory used spring wire hose clamps, by the way, but I hate those things, so I use tower clamps instead, available at any auto parts store.

Although the long hoses with the molded ends that run from the engine into the cabin are available from Studebaker International, the short molded elbow that connects the water valve outlet to the heater core inlet is not. I took the old elbow to my NAPA and, bless their hearts, they picked a molded hose out of their parts bin that filled the bill. (It's a lot closer in dimension to the original than the photo makes it look.) It's NAPA part #11658, in case you're in need of one.

As the Body Manual diagram shows, the straight outlet on the water valve connects to the short pipe on the heater core, using the molded elbow shown above. Once that's connected, it's time to connect the two long hoses from the engine.

The hoses need something to protect them from being cut apart by the firewall, so there are rubber grommets that perform that function, again available from all the usual sources.

I spent a while figuring out how to get the grommets and hoses mounted in the car, and on my first attempt, I tried putting them in their firewall holes and feeding the hoses through them. Wrong move; I should have known that the friction between the rubber parts would prevent this from working. And once installed, the grommets contract a bit too - there was no way this method would work.

I realized that I'd have to slide the grommets on the hoses, feed the hoses through the firewall (one at a time) and then finesse the grommets into place. As you can see, one lip of the grommet is split so that it can compress enough to fit through the sheet metal and grip the other side. Once you've got it started in the hole, you can use a wide screwdriver blade around the perimeter to ease it into position. Or, perhaps, a piece of twine in the mounting groove to install it like you would a car window. (I used the screwdriver.)

Be sure to secure the two hoses to the fender using the strap just behind the alternator. If yours is missing, you can fabricate one or get one used from Stude vendors. On V8 cars like mine, the shorter of the two hoses runs from the elbow on the top of the water manifold to the water valve inlet; the lower hose runs from the lower nipple on the manifold to the long pipe on the heater core.

If you have a 6-cylinder car, the top hose runs to the elbow at the rear of the head and the bottom hose goes to the nipple near the water pump.

When the connections are complete, the core and valve look like this:


The next step is to install the diverter box and connect its control cables. Installing the diverter box is pretty simple; just slip the end over the blower outlet and raise the other end, then secure it to the bracket on the dash using the big screw that held it in. Don't forget to include the wiring harness clip; tuck the wire bundle that goes to the neutral safety and directional switch into it and you're done.

Now for the control cables. Slip them onto the actuator arms for the fresh air control and defroster diverter, and secure them to the metal tabs using the little squiggly spring clips discussed previously. The tang goes into the little hole in the mounting tab, and the other end snaps over the end of the tab These clips are tough to get on by hand, especially if you bought new ones; the easiest way to do it is with a pair of pliers to snap the end, as you can see in the photo below:


After the cables are on, you can connect the defroster ducts to the outlets on the diverter box. As I did with the other end, I used Zip ties to make sure the hoses don't blow off or come loose. I also used a Zip tie to secure the longest hose to the edge of the dash using one of the convenient factory holes. The factory used a metal strap of some kind to do this, but it's no longer available and the Zip tie is just as good.


There's just one thing wrong with this picture: after I connected the blower leads to the dash harness, there was a lot of extra wire. There was no way I was going to leave it like that. More modern tech to the rescue: these spiffy little self-adhesive cable locks I found in the automotive department at Wal-Mart. A couple of these stuck to the bottom of the diverter box and the mess was tidied.


Only one thing left to do: install the screen filter that keeps leaves and other debris from getting into and plugging the heater core. This is a woven metal mesh that slips into the firewall from the engine compartment, and has a rubber seal on the edge that keeps fumes and moisture out. These are available from Studebaker International. My original was shredded thanks to the rodent tenant, so I got a new one.


Congratulations! The heater is now functional again, ready to make your Stude comfy on those winter outings. It's one of the few times when plenty of hot air is a good thing :)

Labels: , , ,